Installing IPVoice App for Desktop
IPVoice Desktop App
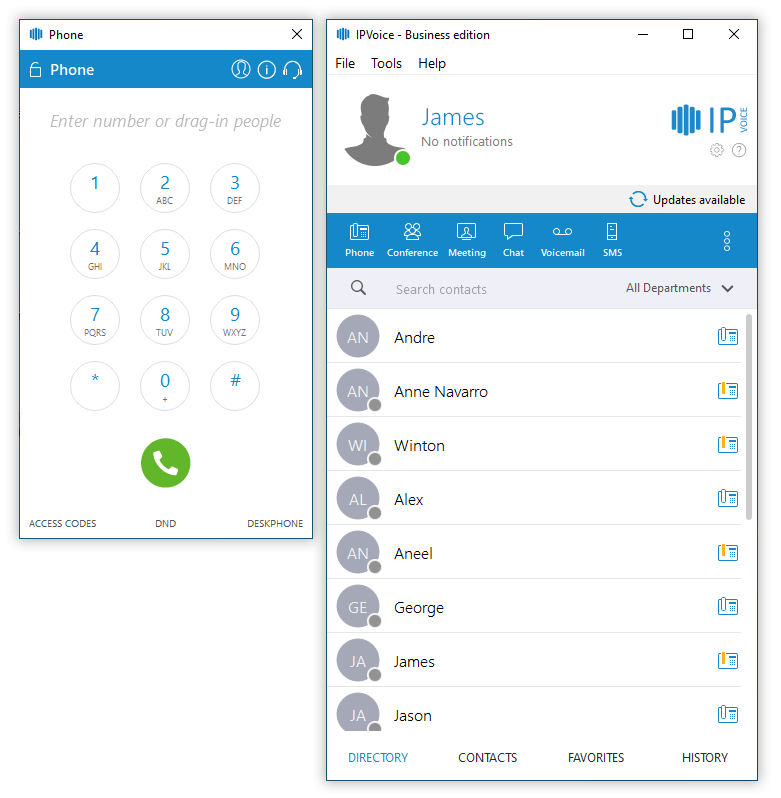
The IPVoice desktop App is a unified communications desktop application that offers businesses soft-phone, CRM Integration, user presence, instant messaging, faxing, conferencing, and agent call centre facilities all in one desktop instance.
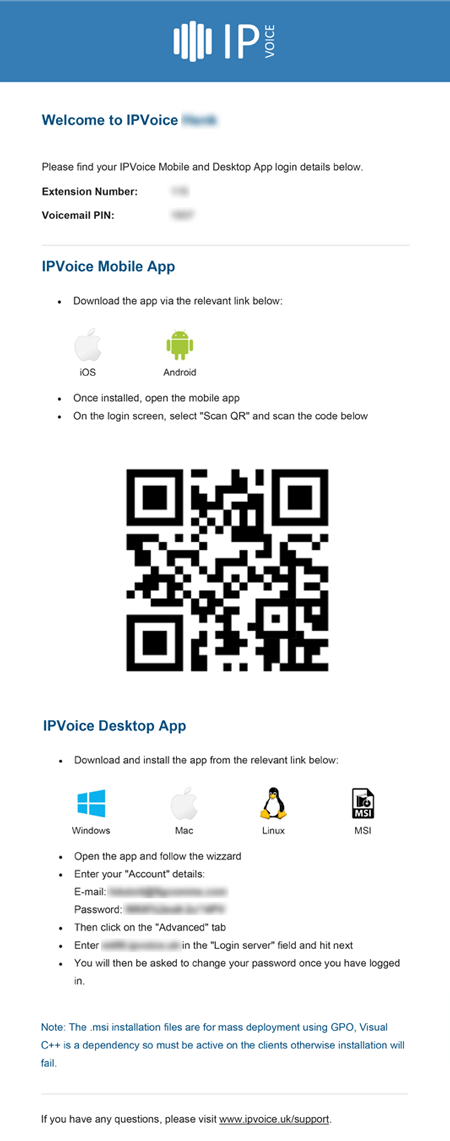
The preferred Method for installing IPVoice applications is through the extensions welcome email, which provides all login details and a link to the latest version of IPVoice.
Alternatively, a link to download the applications can be found here:
Windows:
https://download.ipvoice.uk/software/IPVoice.Windows.exe
Mac:
https://download.ipvoice.uk/software/IPVoice.MACOS.dmg
Linux:
https://download.ipvoice.uk/software/IPVoice.Linux.deb
MSI:
https://download.ipvoice.uk/software/IPVoice.msi
Note: The .msi installation files are for mass deployment using GPO, Visual C++ is a dependency so must be active on the clients otherwise installation will fail.
Welcome Email:
The welcome email generates all of the users details that they require to download and log into the app. The download link also supplies basic instructions of how to install the application.
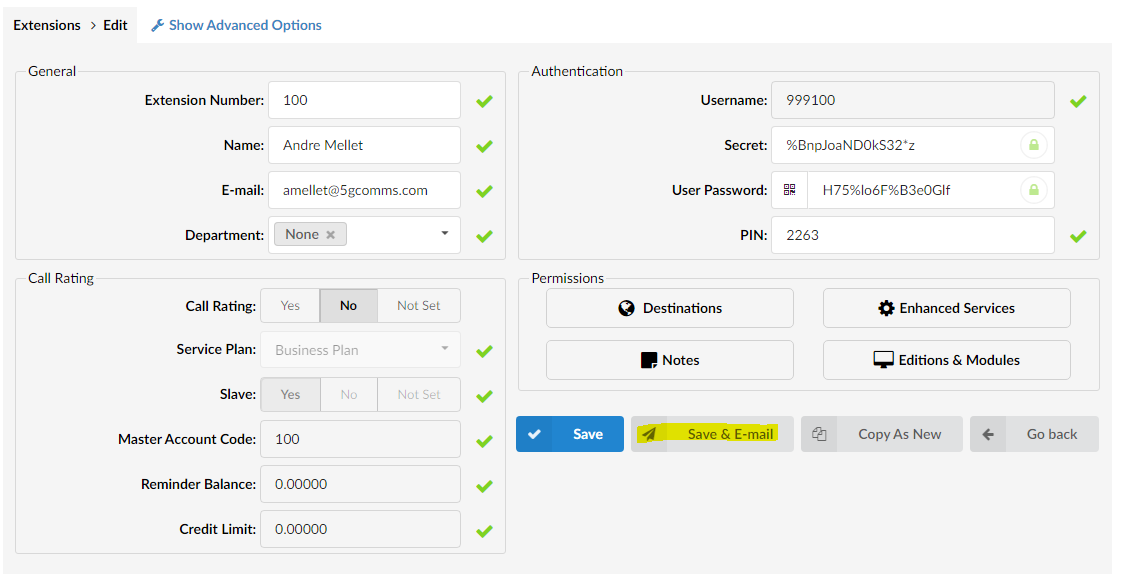
A new welcome email can be generated by pressing the “Save & E-mail” button (may require a User Password reset)
Installation:
Once you have the email, download the required version of IPVoice by clicking the download link beside the icon and run the executable file.
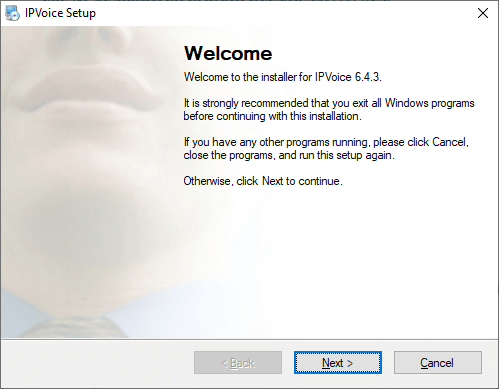
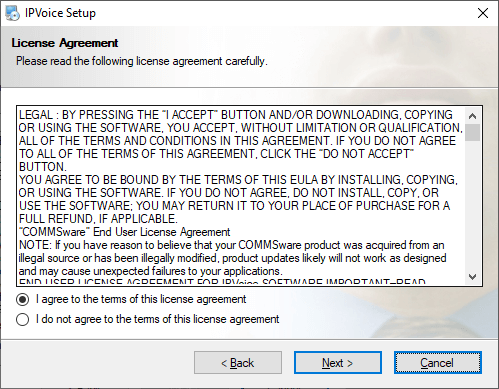
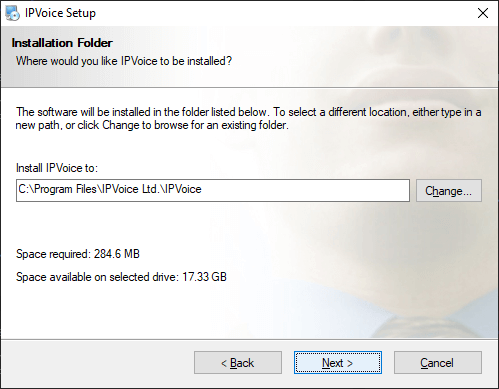
Press Next, Agree to the license agreement and choose an installation location.
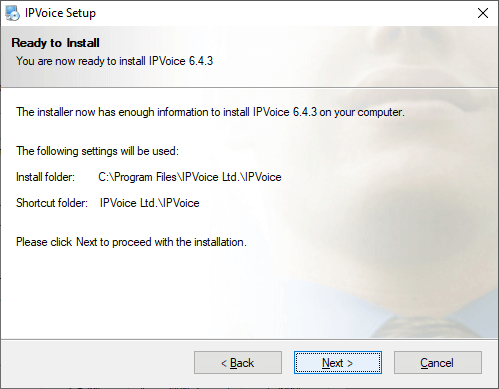
Press “Next” until you are prompted for installation.

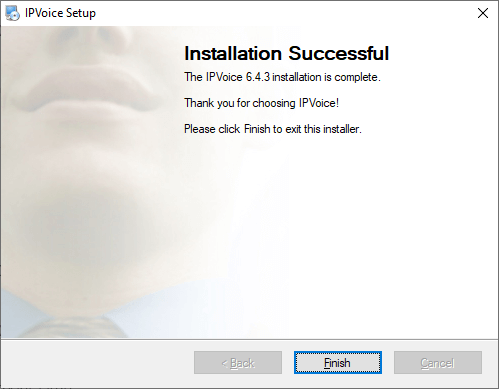
Once the installation is finished, run the IPVoice App to launch into the Profile Wizard.
Logging in:
Log in to the IPVoice App by populating the Account Tab and the Advanced Tab with the information from the Welcome E-mail.
The required information is:
Account:
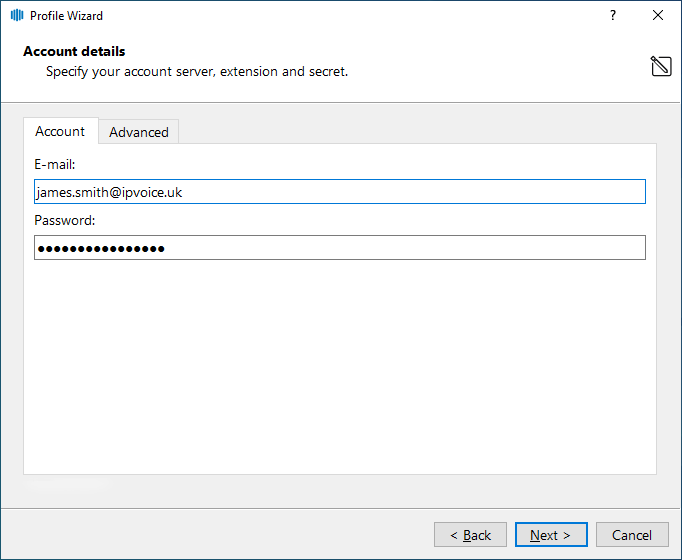
- E-mail: The email address associated with the extension,
- Password: “User Password”
Advanced:
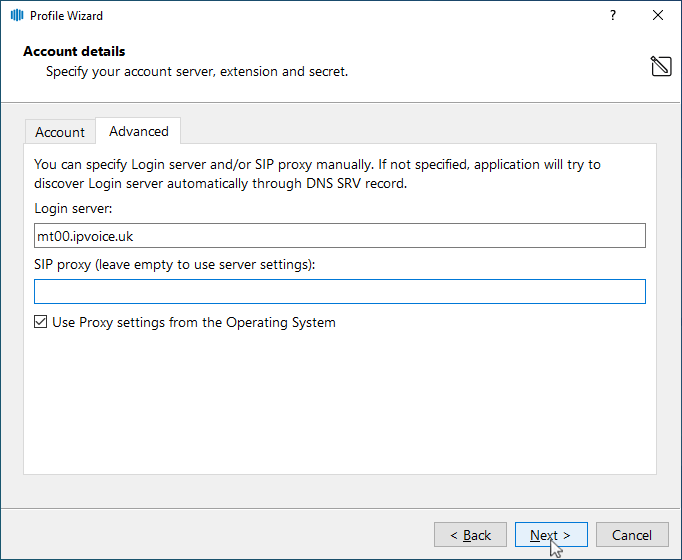
- Login Server: The MT/CC server address the tenant is built on; e.g mt01.ipvoice.uk
- SIP Proxy: Not required, leave blank
Once the information has been populated and “Next” has been pressed, the user will be prompted to change their Password.
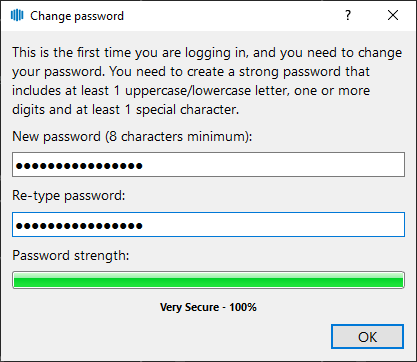
TIP: Once a user has changed their password, their extension will show “encrypted” in the user password field. This is a useful way to see if the end user has gone through the whole setup of the application.
Once the password has been changed, the Phone setup page will appear:
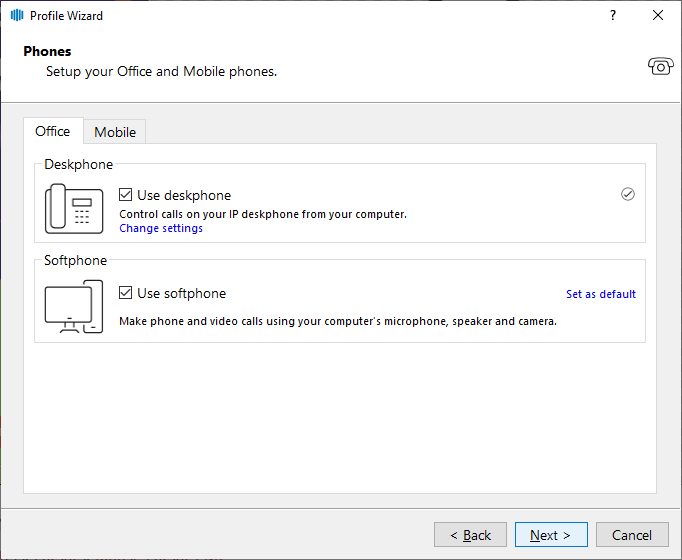
The user is then presented with two options:
Deskphone:
Use the deskphone mode of IPVoice, enabling use of the full suite of IPVoice functions and desktop to handset integration such as transferring calls, putting calls on hold and click to dial.
Softphone:
Use the softphone mode of IPVoice, enabling use of the full suite of IPVoice functions and enabling and registering a softphone on the installed device (Make/Take calls from the computer with a headset).
Note: It is best practice to only enable one of these settings, you can have both enabled but obscure behaviour has been noticed from having both enabled at once.

Once finished, the application will launch.
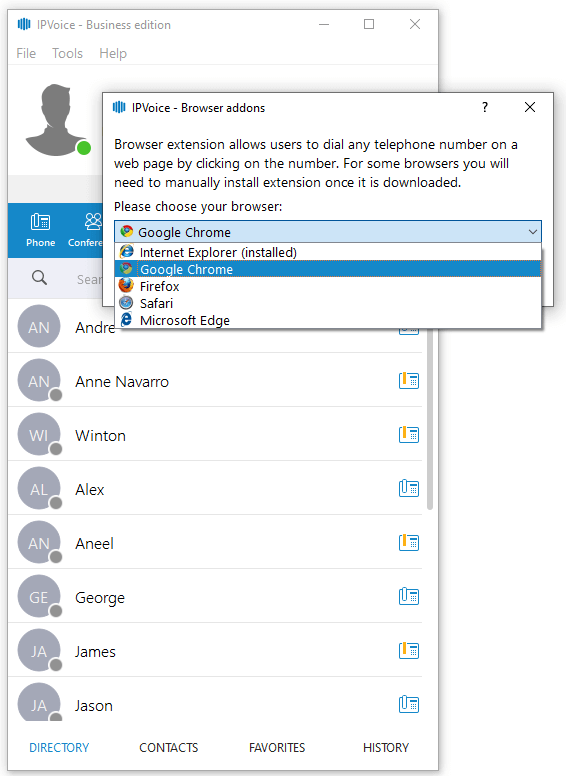
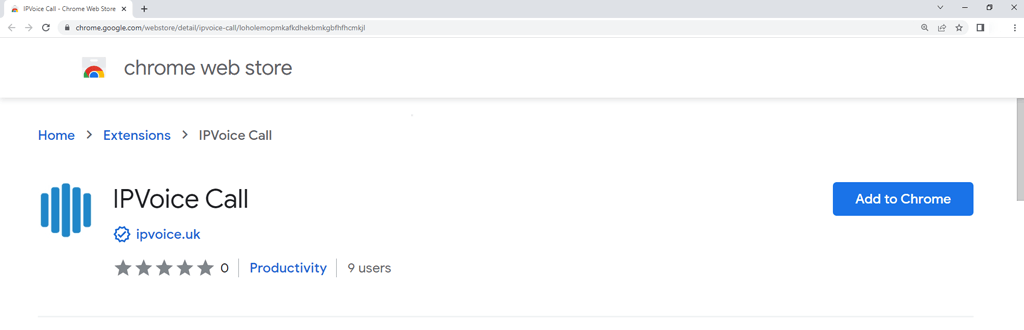
Click to Dial:
When the application is first launched, there will be a prompt whether the browser extension for click to dial is required, if it is you can press yes here or it can be added at a later date through “Tools” > “Web Browser Addons”
If yes is selected, choose the internet browser of choice from the drop down list and follow the instructions given to install the plugin.
Operating System Requirements:
Any PC that is capable of running Windows Vista32/64-bit/ and Mac OS X version 10.10 and later should be capable of running the IPVoice app.
Have more questions? Submit a request